Posts

Showing posts from February, 2019

Change OneDrive Folder Location on Windows 10

Image
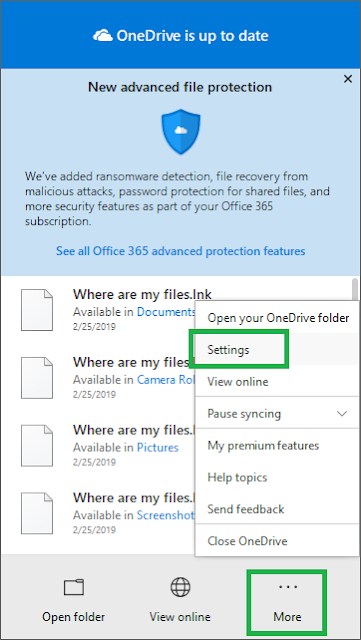
If you have separate drives in your PC, one for Windows 10 and applications and another for data, you will want to move the OneDrive folder from the default C: system drive to the D: data drive. Doing this is not straightforward but can be accomplished by following the steps below: Change OneDrive Folder Location In the System Tray found in the lower right portion of the Taskbar next to the date and time, left-click on the OneDrive cloud icon. Click on More and then Settings Open OneDrive Settings From the Account Tab , click on the Unlink this PC link. Confirm when asked to unlink your account Unlink this PC Next setup OneDrive again by logging in with your Outlook account username and password Setup OneDrive When OneDrive setup shows you the location of the OneDrive folder, this is the opportunity you have to change the folder location Change OneDrive Folder Location That's it! OneDrive will now resync to the new folder location.

Manage Meltdown and Spectre Vulnerabilities on Windows 10

Image
The defects named Meltdown and Spectre affect Windows 10 systems running on both Intel and AMD processors. Shared resource environments, such as virtual machines and containers running in cloud environments, are the most vulnerable to these exploits as one virtual machine could improperly access information from another. However, if you are just using Windows 10 on a standalone PC, the threat of a Meltdown or Spectre attack is limited. Here is how to manage the Meltdown and Spectre patches on your Windows 10 PC: Install SpeculationControl Module In January 2018, Microsoft released a PowerShell script to check if your PC is vulnerable to Meltdown and Spectre. Press Win+S and search for PowerShell . Right-click and select Run as administrator Run PowerShell as Administrator Check the current ExecutionPolicy to make sure PowerShell will allow you to run scripts Type Get-ExecutionPolicy and press Enter If it says "Restricted", then type Set-ExecutionPolicy

Maximize Google Chrome GPU Performance on Windows 10

Image
Ever feel like Google Chrome is still slow even with the latest hardware? Or experience screen tearing or flickering with an AMD FreeSync setup? Good news. There are several optimizations that make Google Chrome run buttery smooth under Windows 10. System Configuration The optimizations were made with the following system configuration: Windows 10 Pro 64-bit Chrome version 72.0.3626.109 AMD Radeon Software Adrenalin 2019 Edition version 19.2.2 GIGABYTE Radeon RX 570 4GB Video Card LG 34CB88-P 34" Ultrawide QHD 21:9 Curved AMD FreeSync 75Hz monitor chrome://flags Settings Open a new tab in Google Chrome and type "chrome://flags" in the URL bar. Then search for each of these flags and make the following changes: GPU Rasterization: Force-enabled for all layers This setting will force Google Chrome to always use the GPU for rasterizing web content Out of Process Rasterization: Enabled This settings performs Ganesh raster in the GPU process Zero-C