Ever feel like Google Chrome is still slow even with the latest hardware? Or experience screen tearing or flickering with an AMD FreeSync setup?
Good news.
There are several optimizations that make Google Chrome run buttery smooth under Windows 10.
System Configuration
The optimizations were made with the following system configuration:
- Windows 10 Pro 64-bit
- Chrome version 72.0.3626.109
- AMD Radeon Software Adrenalin 2019 Edition version 19.2.2
- GIGABYTE Radeon RX 570 4GB Video Card
- LG 34CB88-P 34" Ultrawide QHD 21:9 Curved AMD FreeSync 75Hz monitor
chrome://flags Settings
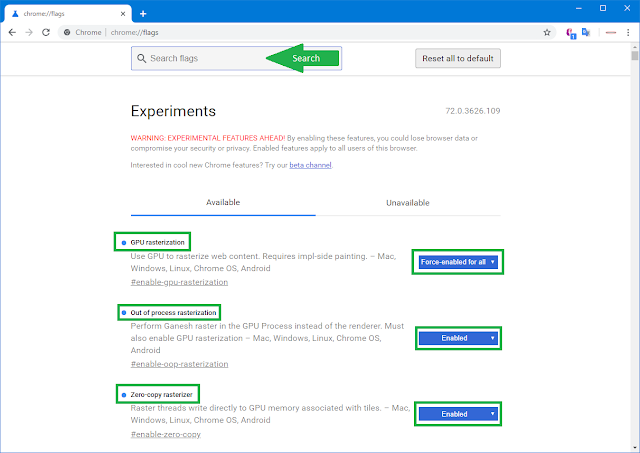
Open a new tab in Google Chrome and type "chrome://flags" in the URL bar. Then search for each of these flags and make the following changes:
- GPU Rasterization: Force-enabled for all layers
- This setting will force Google Chrome to always use the GPU for rasterizing web content
- Out of Process Rasterization: Enabled
- This settings performs Ganesh raster in the GPU process
- Zero-Copy Rasterizer: Enabled
- This setting allows the raster threads to write directly to the GPU memory. Requires hardware accelerated Native GpuMemoryBuffers (see below)
Restart Google Chrome for the new settings to take effect.
 |
| chrome://flags Settings |
chrome://gpu Report
After restarting Google Chrome, open another tab and type "chrome://gpu" in the URL bar. This will show a detailed report about the GPU settings and configuration Google Chrome is currently using.
Native GpuMemoryBuffers
Check the status of the Native GpuMemoryBuffers feature:
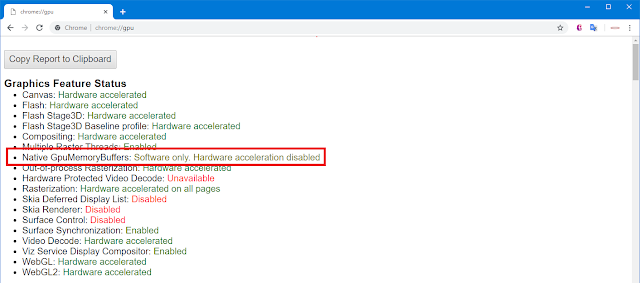 |
| Native GpuMemoryBuffers |
If the status says "Software only. Hardware acceleration disabled", then add the
--enable-native-gpu-memory-buffers command-line switch to the Google Chrome taskbar shortcut:
- Right-click on the Google Chrome icon in the Windows 10 Taskbar
- Right-click on Google Chrome
- Left-click on Properties
 |
| Google Chrome Taskbar Properties |
- In the Target text box append the
--enable-native-gpu-memory-buffers switch to the very end of the command-line. Make sure there is a space in between the command-line and the switch
- Click Apply and then click OK
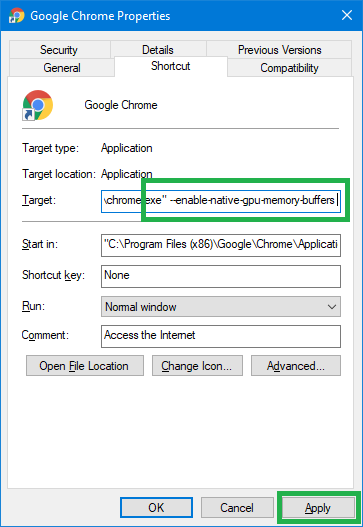 |
| Enable Native GpuMemoryBuffers |
AMD Radeon Google Chrome Profile
The final step in getting the most out of your graphics hardware in Google Chrome is to create an application profile in the
Gaming section of AMD Radeon Settings:
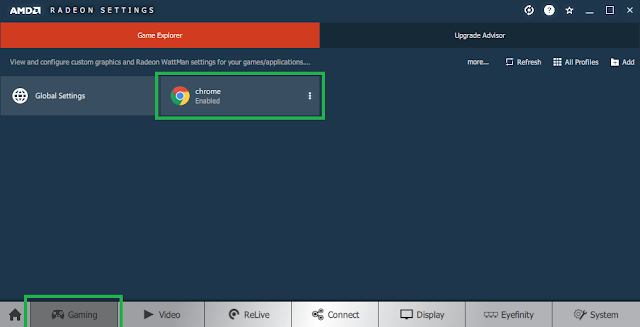 |
| Google Chrome Application Profile |
These are the settings to make inside the Google Chrome application profile:
- OpenGL Triple Buffering: On
- Shader Cache: AMD Optimized
- Tesselation Mode: AMD Optimized
- Radeon FreeSync: AMD Optimized
- Use default settings everywhere else
 |
| Google Chrome Profile Settings |
FishGL
Once all of the above configurations have been made, visit
FishGL to test the configuration and make sure it is operating as expected:
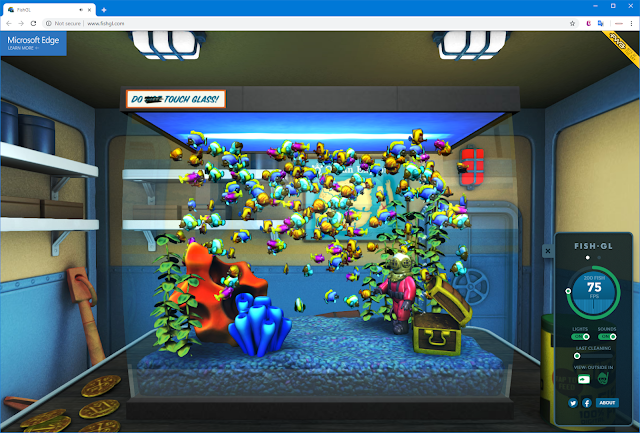 |
| FishGL Results |
With a setting of 200 fish, the frame rate holds at a steady 75Hz which is exactly what I was expecting out of my graphics card and monitor.
Also web pages load faster and scrolling is now buttery smooth with no screen tearing.


Comments
Post a Comment